JNDI DataSource SQL Server used in Web Application created in Netbeans and GlassFish server
In this post I describe you how configuring JEE application to connect to SQL Server database through DataSource. In my last post I use Tomact server, in this it will be GlassFish server.
First create in Netbeans new project. Choose from menu File->New Project.
 From Categories select Java Web and in Projects section choose Web Application.
 Click the Next button. In Project Name field write MyDataSource and click the Next button.
 In New Web Application wizard you see server as GlassFish.

Click the Next button.
 Don’t check any box with framework and click the Finish button.
Your application select data from SQL Server so you must add driver and connection to your database. I described these things in my posts:
How add SQL Server 2012 driver to Netbeans 8?
Add connection in Netbeans 8 to the SQL Server 2012 database.
In next step you must create web.xml file. Right click project node and select New->Others.
 From Categories choose Web and from File Types select web.xml.
 Click the Next button.
 Click the Finish button.
In project tree you see configuration file:
 It is content of generating web.xml file:
 Paste into web-app tags this code:
    Ref to SQL Server data source
    jdbc/sql2012
    javax.sql.ConnectionPoolDataSource
    Container
It is your new web.xml configuration file:
 You must used the GlassFish server change content of res-type tag of web.xml from javax.sql.DataSource to javax.sql.ConnectionPoolDataSource.
Last step it is delete index.xhtml file and create new file: index.jsp.
After delete index.xhtml file, right click project node and select New->Other.
From Categories choose Web and from File Types choose JSP.
 Click the Next button. In File Name field write index and click Finish button.
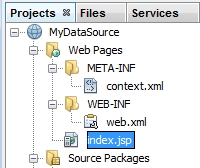
 In tree of project you can see it file.
 It is content this file:
 Paste into this code:
        People


                    select name from person;


People
It is new content index.jsp file:
 Run application.
