Jak zapisywać proste kształty geometryczne do tablic numpy
Chciałbym wygenerować tablicę numpy o wymiarach 200x200 elementów i umieścić w niej okrąg wyśrodkowany na 100,100 współrzędnych, promień 80 i szerokość obrysu 3 pikseli. Jak to zrobić w Pythonie 2.7 bez angażowania operacji na plikach? Możliwe wykorzystanie bibliotek geometrii lub obrazowania w celu umożliwienia uogólnienia na inne kształty.
5 answers
Cairo to nowoczesna, elastyczna i szybka biblioteka grafiki 2D. Posiada wiązania Pythona i umożliwia tworzenie "powierzchni"na podstawie tablic NumPy:
import numpy
import cairo
import math
data = numpy.zeros((200, 200, 4), dtype=numpy.uint8)
surface = cairo.ImageSurface.create_for_data(
    data, cairo.FORMAT_ARGB32, 200, 200)
cr = cairo.Context(surface)

# fill with solid white
cr.set_source_rgb(1.0, 1.0, 1.0)
cr.paint()

# draw red circle
cr.arc(100, 100, 80, 0, 2*math.pi)
cr.set_line_width(3)
cr.set_source_rgb(1.0, 0.0, 0.0)
cr.stroke()

# write output
print data[38:48, 38:48, 0]
surface.write_to_png("circle.png")
Ten kod drukuje
[[255 255 255 255 255 255 255 255 132   1]
 [255 255 255 255 255 255 252 101   0   0]
 [255 255 255 255 255 251  89   0   0   0]
 [255 255 255 255 249  80   0   0   0  97]
 [255 255 255 246  70   0   0   0 116 254]
 [255 255 249  75   0   0   0 126 255 255]
 [255 252  85   0   0   0 128 255 255 255]
 [255 103   0   0   0 118 255 255 255 255]
 [135   0   0   0 111 255 255 255 255 255]
 [  1   0   0  97 254 255 255 255 255 255]]
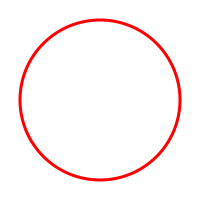
Pokazanie jakiegoś przypadkowego fragmentu okręgu. Tworzy również ten PNG:
Warning: date(): Invalid date.timezone value 'Europe/Kyiv', we selected the timezone 'UTC' for now. in /var/www/agent_stack/data/www/doraprojects.net/template/agent.layouts/content.php on line 54
2012-04-05 17:03:24
Zwyczajowym sposobem jest zdefiniowanie siatki współrzędnych i zastosowanie równań kształtu. Aby to zrobić najprostszym sposobem jest użycie numpy.mgrid:
Http://docs.scipy.org/doc/numpy/reference/generated/numpy.mgrid.html
# xx and yy are 200x200 tables containing the x and y coordinates as values
# mgrid is a mesh creation helper
xx, yy = numpy.mgrid[:200, :200]
# circles contains the squared distance to the (100, 100) point
# we are just using the circle equation learnt at school
circle = (xx - 100) ** 2 + (yy - 100) ** 2
# donuts contains 1's and 0's organized in a donut shape
# you apply 2 thresholds on circle to define the shape
donut = numpy.logical_and(circle < (6400 + 60), circle > (6400 - 60))
Warning: date(): Invalid date.timezone value 'Europe/Kyiv', we selected the timezone 'UTC' for now. in /var/www/agent_stack/data/www/doraprojects.net/template/agent.layouts/content.php on line 54
2012-04-06 14:56:23
Inną możliwością jest użycie scikit-image. Możesz użyć circle_perimeter dla pustego lub circle dla pełnego okręgu.
Możesz narysować pojedynczy okrąg w następujący sposób:
import matplotlib.pyplot as plt
from skimage import draw
arr = np.zeros((200, 200))
rr, cc = draw.circle_perimeter(100, 100, radius=80, shape=arr.shape)
arr[rr, cc] = 1
plt.imshow(arr)
plt.show()
Można również emulować obrys za pomocą loop. W takim przypadku należy użyć wersji antyaliasowanej, aby uniknąć artefaktów:
import matplotlib.pyplot as plt
from skimage import draw
arr = np.zeros((200, 200))
stroke = 3
# Create stroke-many circles centered at radius.
for delta in range(-(stroke // 2) + (stroke % 2), (stroke + 1) // 2):
    rr, cc, _ = draw.circle_perimeter_aa(100, 100, radius=80+delta, shape=arr.shape)
    arr[rr, cc] = 1
plt.imshow(arr)
plt.show()
Prawdopodobnie bardziej efektywnym sposobem jest wygenerowanie dwóch pełnych okręgów i "odjęcie" wewnętrznego od zewnętrznego:
import matplotlib.pyplot as plt
from skimage import draw
arr = np.zeros((200, 200))
stroke = 3
# Create an outer and inner circle. Then subtract the inner from the outer.
radius = 80
inner_radius = radius - (stroke // 2) + (stroke % 2) - 1
outer_radius = radius + ((stroke + 1) // 2)
ri, ci = draw.circle(100, 100, radius=inner_radius, shape=arr.shape)
ro, co = draw.circle(100, 100, radius=outer_radius, shape=arr.shape)
arr[ro, co] = 1
arr[ri, ci] = 0
plt.imshow(arr)
plt.show()
Obie metody dajƒÖ w rzeczywisto≈õci nieco inne wyniki.

Warning: date(): Invalid date.timezone value 'Europe/Kyiv', we selected the timezone 'UTC' for now. in /var/www/agent_stack/data/www/doraprojects.net/template/agent.layouts/content.php on line 54
2017-01-05 21:40:21
Opencv nowe powiƒÖzania Pythona import cv2 tworzenie tablic numpy jako domy≈õlnego formatu obrazu
ZawierajƒÖ funkcje rysowania
Warning: date(): Invalid date.timezone value 'Europe/Kyiv', we selected the timezone 'UTC' for now. in /var/www/agent_stack/data/www/doraprojects.net/template/agent.layouts/content.php on line 54
2019-04-13 10:31:55
Jeden sposób, aby to zrobić używając tylko numpy, (podobny do odpowiedzi @Simon) jest następujący:
import numpy as np

def draw_circle(radius, dim=None):
    if dim == None:
        dim = (radius * 2, radius * 2)
    circle = np.zeros(dim)
    x, y = np.meshgrid(np.arange(dim[0]), np.arange(dim[1]))
    r = np.abs((x - dim[0] / 2)**2 + (y - dim[1] / 2)**2 - radius**2)

    m1 = r.min(axis=1, keepdims=True)
    m2 = r.min(axis=0, keepdims=True)
    rr = np.logical_or(r == m1, r == m2)
    l_x_lim = int(dim[0] / 2 - radius)
    u_x_lim = int(dim[0] / 2 + radius + 1)
    l_y_lim = int(dim[0] / 2 - radius)
    u_y_lim = int(dim[0] / 2 + radius + 1)

    circle[l_x_lim:u_x_lim, l_y_lim:u_y_lim][rr[l_x_lim:u_x_lim, l_y_lim:u_y_lim]] = 1
    return circle

gen_circle(20) # draw a circle of radius 20 pixels
Warning: date(): Invalid date.timezone value 'Europe/Kyiv', we selected the timezone 'UTC' for now. in /var/www/agent_stack/data/www/doraprojects.net/template/agent.layouts/content.php on line 54
2019-01-25 03:51:17