Jak przesuwać Pasek czynności wraz z nawigacją
To, co chcę zrobić, to wsunąć ActionBar wraz z NavigationDrawer, gdy szuflada jest otwarta. Obecnie nie korzystam z bibliotek stron trzecich i jeśli to możliwe, chcę, aby tak zostało. Wszystko czego potrzebuję to implementacja metody jak: getActionBarView.slide(dp);
Jest to kod, którego obecnie używam do tworzenia NavigationDrawer:
mDrawerToggle = new ActionBarDrawerToggle(this, drawerLayout, R.drawable.ic_drawer, R.string.drawer_open, R.string.drawer_close) {

    public void onDrawerClosed(View view) {
        invalidateOptionsMenu();

        // calling onPrepareOptionsMenu() to hide action bar icons
    }

    @Override
    public void onDrawerSlide(View drawerView, float slideOffset) {
        if (getDeviceType(getApplicationContext()) == DEVICE_TYPE_PHONE) {
            drawerLayout.setScrimColor(Color.parseColor("#00FFFFFF"));
            float moveFactor = (listView.getWidth() * slideOffset);
            if (Build.VERSION.SDK_INT >= Build.VERSION_CODES.HONEYCOMB) {
                all_menu_container_parent.setTranslationX(moveFactor);
            } else {
                TranslateAnimation anim = new TranslateAnimation(lastTranslate, moveFactor, 0.0f, 0.0f);
                anim.setDuration(0);
                anim.setFillAfter(true);
                all_menu_container_parent.startAnimation(anim);

                lastTranslate = moveFactor;
            }
        }
    }

    public void onDrawerOpened(View drawerView) {
        // calling onPrepareOptionsMenu() to hide action bar icons
    }
};
drawerLayout.setDrawerListener(mDrawerToggle);
Ale nie robi tego, co chcę, produkuje to:
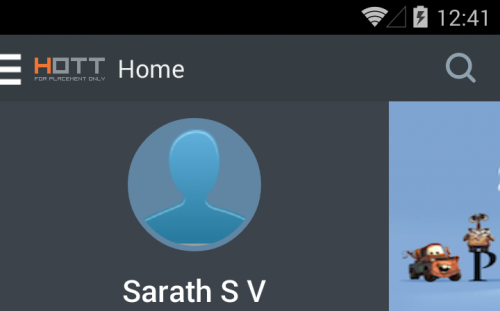
Chcę osiągnąć to:

1 answers
Uwaga:[75]} ta odpowiedź została pierwotnie napisana, gdy Android 4.4 (KitKat) był jeszcze całkiem nowy. Od Androida 5.0, a zwłaszcza ze względu na wprowadzenie
ToolBartej odpowiedzi nie można uważany za up-to-date już! Ale z technicznego punktu widzenia i dla Ci z Was, którzy chcą dowiedzieć się o wewnętrznym działaniu Androida ta odpowiedź może nadal mieć wiele wartości!
{[17] } został specjalnie zaprojektowany, aby znajdować się pod ActionBar i nie ma sposobu, aby zaimplementować NavigationDrawer, aby ActionBar poruszać się z nim-chyba że może szukasz View, który tworzy ActionBar i animowanie go obok NavigationDrawer, ale nigdy nie polecam czegoś takiego, ponieważ byłoby to trudne i podatne na błędy. Moim zdaniem masz tylko dwie opcje:
- używając biblioteka jak SlidingMenu
- implementacja niestandardowego menu przesuwnego
Skoro powiedziałeś, że nie chcesz korzystać z biblioteki implementującej niestandardowe menu przesuwne jest jedyną opcją, na szczęście nie jest to naprawdę trudne, gdy wiesz, jak to zrobić.
1) Podstawowe Wyjaśnienie
Możesz przenieść całą zawartość Activity - mam na myśli wszystko, łącznie z ActionBar - poprzez umieszczenie marginesu lub paddingu na View, który składa się na Activity. To View jest rodzicem View o id android.R.id.content:
View content = (View) activity.findViewById(android.R.id.content).getParent();
Na Honeycomb (Android w wersji 3.0 - poziom API 11) lub powyżej-innymi słowy po wprowadzeniu ActionBar - należy użyć marginesów, aby zmienić pozycję Activities, a w poprzednich wersjach użyć paddingu. Aby to uprościć, zalecam stworzenie metod pomocniczych, które wykonują poprawną akcję dla każdego poziomu API. Najpierw przyjrzyjmy się, jak ustawić pozycję Activity:
public void setActivityPosition(int x, int y) {
    // With this if statement we can check if the devices API level is above Honeycomb or below
    if(Build.VERSION.SDK_INT >= Build.VERSION_CODES.HONEYCOMB) {
        // On Honeycomb or abvoe we set a margin
        FrameLayout.LayoutParams contentParams = (FrameLayout.LayoutParams) this.content.getLayoutParams();
        contentParams.setMargins(x, y, -x, -y);
        this.content.setLayoutParams(contentParams);
    } else {
        // And on devices below Honeycomb we set a padding
        this.content.setPadding(x, y, -x, -y);
    }
}
Zauważ, że w obu przypadkach istnieje albo ujemny margines, albo ujemna wyściółka po przeciwnych stronach. Ma to zasadniczo zwiększyć rozmiar Activity poza jej normalnymi granicami. Zapobiega to zmianie rzeczywistego rozmiaru Activity, gdy przesuniemy go gdzieś.
Potrzebujemy dodatkowo dwóch metod, aby uzyskać bieżącą pozycję Activity. Jeden dla pozycji x, jeden dla pozycji y:
public int getActivityPositionX() {
    if(Build.VERSION.SDK_INT >= Build.VERSION_CODES.HONEYCOMB) {
        // On Honeycomb or above we return the left margin
        FrameLayout.LayoutParams contentParams = (FrameLayout.LayoutParams) this.content.getLayoutParams();
        return contentParams.leftMargin;
    } else {
        // On devices below Honeycomb we return the left padding
        return this.content.getPaddingLeft();
    }
}

public int getActivityPositionY() {
    if(Build.VERSION.SDK_INT >= Build.VERSION_CODES.HONEYCOMB) {
        // On Honeycomb or above we return the top margin
        FrameLayout.LayoutParams contentParams = (FrameLayout.LayoutParams) this.content.getLayoutParams();
        return contentParams.topMargin;
    } else {
        // On devices below Honeycomb we return the top padding
        return this.content.getPaddingTop();
    }
}
Dodawanie animacji jest również bardzo proste. Jedyną ważną rzeczą jest tutaj odrobina matematyki, aby animować ją z poprzedniej pozycji do nowej pozycji
// We get the current position of the Activity
final int currentX = getActivityPositionX();
final int currentY = getActivityPositionY();

// The new position is set
setActivityPosition(x, y);

// We animate the Activity to slide from its previous position to its new position
TranslateAnimation animation = new TranslateAnimation(currentX - x, 0, currentY - y, 0);
animation.setDuration(500);
this.content.startAnimation(animation);
Możesz wyświetlić View w miejscu, które jest odsłaniając Activity przez dodanie go do rodzica View:
final int currentX = getActivityPositionX();

FrameLayout menuContainer = new FrameLayout(context);

// The width of the menu is equal to the x position of the `Activity`
FrameLayout.LayoutParams params = new FrameLayout.LayoutParams(currentX, ViewGroup.LayoutParams.MATCH_PARENT);
menuContainer.setLayoutParams(params);

ViewGroup parent = (ViewGroup) content.getParent();
parent.addView(menuContainer);
I to prawie wszystko, czego potrzebujesz, aby utworzyć podstawowe menu przesuwne, które działa na większości, jeśli nie wszystkich urządzeń powyżej Eclair (Android 2.1-poziom API 7).
2) animowanie Activity
Pierwszą częścią tworzenia menu przesuwnego jest przesunięcie Activity z drogi. Jako takie powinniśmy najpierw spróbować przenieść Activity wokół tak:
Aby stworzyć to my wystarczy umieścić powyższy kod razem:
import android.os.Build;
import android.support.v4.app.FragmentActivity;
import android.view.View;
import android.view.animation.TranslateAnimation;
import android.widget.FrameLayout;

public class ActivitySlider {

    private final FragmentActivity activity;
    private final View content;

    public ActivitySlider(FragmentActivity activity) {
        this.activity = activity;

        // Here we get the content View from the Activity.
        this.content = (View) activity.findViewById(android.R.id.content).getParent();
    }

    public void slideTo(int x, int y) {

        // We get the current position of the Activity
        final int currentX = getActivityPositionX();
        final int currentY = getActivityPositionY();

        // The new position is set
        setActivityPosition(x, y);

        // We animate the Activity to slide from its previous position to its new position
        TranslateAnimation animation = new TranslateAnimation(currentX - x, 0, currentY - y, 0);
        animation.setDuration(500);
        this.content.startAnimation(animation);
    }

    public void setActivityPosition(int x, int y) {
        // With this if statement we can check if the devices API level is above Honeycomb or below
        if (Build.VERSION.SDK_INT >= Build.VERSION_CODES.HONEYCOMB) {
            // On Honeycomb or above we set a margin
            FrameLayout.LayoutParams contentParams = (FrameLayout.LayoutParams) this.content.getLayoutParams();
            contentParams.setMargins(x, y, -x, -y);
            this.content.setLayoutParams(contentParams);
        } else {
            // And on devices below Honeycomb we set a padding
            this.content.setPadding(x, y, -x, -y);
        }
    }

    public int getActivityPositionX() {
        if (Build.VERSION.SDK_INT >= Build.VERSION_CODES.HONEYCOMB) {
            // On Honeycomb or above we return the left margin
            FrameLayout.LayoutParams contentParams = (FrameLayout.LayoutParams) this.content.getLayoutParams();
            return contentParams.leftMargin;
        } else {
            // On devices below Honeycomb we return the left padding
            return this.content.getPaddingLeft();
        }
    }

    public int getActivityPositionY() {
        if (Build.VERSION.SDK_INT >= Build.VERSION_CODES.HONEYCOMB) {
            // On Honeycomb or above we return the top margin
            FrameLayout.LayoutParams contentParams = (FrameLayout.LayoutParams) this.content.getLayoutParams();
            return contentParams.topMargin;
        } else {
            // On devices below Honeycomb we return the top padding
            return this.content.getPaddingTop();
        }
    }
}
Możesz użyć klasy ActivitySlider w następujący sposób:
ActivitySlider slider = new ActivitySlider(activity);

// This would move the Activity 400 pixel to the right and 100 pixel down
slider.slideTo(400, 100);
3) Dodawanie menu przesuwnego
Teraz chcemy ujawnić menu, gdy Activity przesunie się w ten sposób:
Jak widać również popycha ActionBar na bok.
Klasa ActivitySlider nie musi być tak bardzo modyfikowana, aby utworzyć przesuwne menu, w zasadzie dodajemy tylko dwie metody, showMenu() i hideMenu(). Będę trzymać się najlepszych praktyk i użyj Fragment jako menu przesuwne. Pierwszą rzeczą, której potrzebujemy, jest View - na przykład FrameLayout - jako kontener dla naszego Fragment. Musimy dodać to View do rodzica View z Activity:
// We get the View of the Activity
View content = (View) activity.findViewById(android.R.id.content).getParent();

// And its parent
ViewGroup parent = (ViewGroup)  content.getParent();

// The container for the menu Fragment is a FrameLayout
// We set an id so we can perform FragmentTransactions later on
FrameLayout menuContainer = new FrameLayout(this.activity);
menuContainer.setId(R.id.flMenuContainer);

// The visibility is set to GONE because the menu is initially hidden
menuContainer.setVisibility(View.GONE);

// The container for the menu Fragment is added to the parent
parent.addView(menuContainer);
Ponieważ ustawiamy widoczność kontenera View na widoczną tylko wtedy, gdy menu przesuwne jest rzeczywiście otwarte, możemy użyć następującej metody, aby sprawdzić, czy menu jest otwarte czy zamknięte:
public boolean isMenuVisible() {
    return this.menuContainer.getVisibility() == View.VISIBLE;
}
Aby ustawić menu Fragment dodajemy metodę setter, która wykonuje FragmentTransaction i dodaje menu Fragment do FrameLayout:
public void setMenuFragment(Fragment fragment) {
    FragmentManager manager = this.activity.getSupportFragmentManager();
    FragmentTransaction transaction = manager.beginTransaction();
    transaction.replace(R.id.flMenuContainer, fragment);
    transaction.commit();
}
Dodaję również drugi setter, który tworzy instancję Fragment Z Class dla wygody:
public <T extends Fragment> void setMenuFragment(Class<T> cls) {
    Fragment fragment = Fragment.instantiate(this.activity, cls.getName());
    setMenuFragment(fragment);
}
Jest jeszcze jedna ważna rzecz do rozważenia, jeśli chodzi o menu Fragment. Działamy znacznie dalej w hierarchii View niż zwykle. Jako takie musimy wziąć pod uwagę takie rzeczy jak wysokość paska stanu. Gdybyśmy nie uwzględnili tego na górze menu Fragment czy bylibyśmy ukryci za pasek stanu. Możesz uzyskać wysokość paska stanu w następujący sposób:
Rect rectangle = new Rect();
Window window = this.activity.getWindow();
window.getDecorView().getWindowVisibleDisplayFrame(rectangle);
final int statusBarHeight = rectangle.top;
Musimy umieścić górny margines na pojemniku View menu Fragment w następujący sposób:
// These are the LayoutParams for the menu Fragment
FrameLayout.LayoutParams params = new FrameLayout.LayoutParams(width, ViewGroup.LayoutParams.MATCH_PARENT);

// We put a top margin on the menu Fragment container which is equal to the status bar height
params.setMargins(0, statusBarHeight, 0, 0);
menuContainer.setLayoutParams(fragmentParams);
Wreszcie możemy to wszystko połączyć:
import android.graphics.Rect;
import android.os.Build;
import android.support.v4.app.Fragment;
import android.support.v4.app.FragmentActivity;
import android.support.v4.app.FragmentManager;
import android.support.v4.app.FragmentTransaction;
import android.view.View;
import android.view.ViewGroup;
import android.view.Window;
import android.view.animation.Animation;
import android.view.animation.TranslateAnimation;
import android.widget.FrameLayout;
import at.test.app.R;
import at.test.app.helper.LayoutHelper;

public class ActivitySlider {

    private final FragmentActivity activity;
    private final View content;
    private final FrameLayout menuContainer;

    public ActivitySlider(FragmentActivity activity) {
        this.activity = activity;

        // We get the View of the Activity
        this.content = (View) activity.findViewById(android.R.id.content).getParent();

        // And its parent
        ViewGroup parent = (ViewGroup) this.content.getParent();

        // The container for the menu Fragment is added to the parent. We set an id so we can perform FragmentTransactions later on
        this.menuContainer = new FrameLayout(this.activity);
        this.menuContainer.setId(R.id.flMenuContainer);

        // We set visibility to GONE because the menu is initially hidden
        this.menuContainer.setVisibility(View.GONE);
        parent.addView(this.menuContainer);
    }

    public <T extends Fragment> void setMenuFragment(Class<T> cls) {
        Fragment fragment = Fragment.instantiate(this.activity, cls.getName());
        setMenuFragment(fragment);
    }

    public void setMenuFragment(Fragment fragment) {
        FragmentManager manager = this.activity.getSupportFragmentManager();
        FragmentTransaction transaction = manager.beginTransaction();
        transaction.replace(R.id.flMenuContainer, fragment);
        transaction.commit();
    }

    public boolean isMenuVisible() {
        return this.menuContainer.getVisibility() == View.VISIBLE;
    }

    // We pass the width of the menu in dip to showMenu()
    public void showMenu(int dpWidth) {

        // We convert the width from dip into pixels
        final int menuWidth = LayoutHelper.dpToPixel(this.activity, dpWidth);

        // We move the Activity out of the way
        slideTo(menuWidth, 0);

        // We have to take the height of the status bar at the top into account!
        Rect rectangle = new Rect();
        Window window = this.activity.getWindow();
        window.getDecorView().getWindowVisibleDisplayFrame(rectangle);
        final int statusBarHeight = rectangle.top;

        // These are the LayoutParams for the menu Fragment
        FrameLayout.LayoutParams fragmentParams = new FrameLayout.LayoutParams(menuWidth, ViewGroup.LayoutParams.MATCH_PARENT);

        // We put a top margin on the menu Fragment container which is equal to the status bar height
        fragmentParams.setMargins(0, statusBarHeight, 0, 0);
        this.menuContainer.setLayoutParams(fragmentParams);

        // Perform the animation only if the menu is not visible
        if(!isMenuVisible()) {

            // Visibility of the menu container View is set to VISIBLE
            this.menuContainer.setVisibility(View.VISIBLE);

            // The menu slides in from the right
            TranslateAnimation animation = new TranslateAnimation(-menuWidth, 0, 0, 0);
            animation.setDuration(500);
            this.menuContainer.startAnimation(animation);
        }
    }

    public void hideMenu() {

        // We can only hide the menu if it is visible
        if(isMenuVisible()) {

            // We slide the Activity back to its original position
            slideTo(0, 0);

            // We need the width of the menu to properly animate it
            final int menuWidth = this.menuContainer.getWidth();

            // Now we need an extra animation for the menu fragment container
            TranslateAnimation menuAnimation = new TranslateAnimation(0, -menuWidth, 0, 0);
            menuAnimation.setDuration(500);
            menuAnimation.setAnimationListener(new Animation.AnimationListener() {
                @Override
                public void onAnimationStart(Animation animation) {

                }

                @Override
                public void onAnimationEnd(Animation animation) {
                    // As soon as the hide animation is finished we set the visibility of the fragment container back to GONE
                    menuContainer.setVisibility(View.GONE);
                }

                @Override
                public void onAnimationRepeat(Animation animation) {

                }
            });
            this.menuContainer.startAnimation(menuAnimation);
        }
    }

    public void slideTo(int x, int y) {

        // We get the current position of the Activity
        final int currentX = getActivityPositionX();
        final int currentY = getActivityPositionY();

        // The new position is set
        setActivityPosition(x, y);

        // We animate the Activity to slide from its previous position to its new position
        TranslateAnimation animation = new TranslateAnimation(currentX - x, 0, currentY - y, 0);
        animation.setDuration(500);
        this.content.startAnimation(animation);
    }

    public void setActivityPosition(int x, int y) {
        // With this if statement we can check if the devices API level is above Honeycomb or below
        if(Build.VERSION.SDK_INT >= Build.VERSION_CODES.HONEYCOMB) {
            // On Honeycomb or above we set a margin
            FrameLayout.LayoutParams contentParams = (FrameLayout.LayoutParams) this.content.getLayoutParams();
            contentParams.setMargins(x, y, -x, -y);
            this.content.setLayoutParams(contentParams);
        } else {
            // And on devices below Honeycomb we set a padding
            this.content.setPadding(x, y, -x, -y);
        }
    }

    public int getActivityPositionX() {
        if(Build.VERSION.SDK_INT >= Build.VERSION_CODES.HONEYCOMB) {
            // On Honeycomb or above we return the left margin
            FrameLayout.LayoutParams contentParams = (FrameLayout.LayoutParams) this.content.getLayoutParams();
            return contentParams.leftMargin;
        } else {
            // On devices below Honeycomb we return the left padding
            return this.content.getPaddingLeft();
        }
    }

    public int getActivityPositionY() {
        if(Build.VERSION.SDK_INT >= Build.VERSION_CODES.HONEYCOMB) {
            // On Honeycomb or above we return the top margin
            FrameLayout.LayoutParams contentParams = (FrameLayout.LayoutParams) this.content.getLayoutParams();
            return contentParams.topMargin;
        } else {
            // On devices below Honeycomb we return the top padding
            return this.content.getPaddingTop();
        }
    }
}
Używam statycznej metody pomocniczej w showMenu() do konwersji dip na piksele. Oto Kod tej metody:
public static int dpToPixel(Context context, int dp) {
    float scale = getDisplayDensityFactor(context);
    return (int) (dp * scale + 0.5f);
}

private static float getDisplayDensityFactor(Context context) {
    if (context != null) {
        Resources res = context.getResources();
        if (res != null) {
            DisplayMetrics metrics = res.getDisplayMetrics();
            if(metrics != null) {
                return metrics.density;
            }
        }
    }
    return 1.0f;
}
Możesz użyć nowej wersji klasy ActivitySlider w następujący sposób:
ActivitySlider slider = new ActivitySlider(activity);
slider.setMenuFragment(MenuFragment.class);

// The menu is shown with a width of 200 dip
slider.showMenu(200);

...

// Hide the menu again
slider.hideMenu();
4) Wnioski I Testy
Robiąc coś takiego jest zaskakująco proste, gdy wiesz, że możesz po prostu umieścić margines lub wyściółkę na View Activity. Ale trudność polega na tym, że działa na wielu różnych urządzeniach. Implementacje mogą się wiele zmienić na wielu poziomach API, co może mieć znaczny wpływ na to, jak to się zachowuje. Mimo tego, każdy kod, który tu opublikowałem, powinien działać na większości, jeśli nie wszystkich urządzeń powyżej Eclair (Android 2.1 - poziom API 7) bez żadnych problemów.
Oczywiście rozwiązanie I opublikowane tutaj nie jest kompletna, może użyć trochę dodatkowego polerowania i czyszczenia, więc nie krępuj się, aby poprawić kod do własnych potrzeb!
Przetestowałem wszystko na następujących urządzeniach:
HTC
- One M8 (Android 4.4.2 - KitKat): Działa
- Sensation (Android 4.0.3-Ice Cream Sandwich): Working
- Desire (Android 2.3.3-Gingerbread): Działa
- One (Android 4.4.2-KitKat): Działa
Samsung
- Galaxy S3 Mini (Android 4.1.2-Jelly Bean): Działa
- Galaxy S4 Mini (Android 4.2.2-Jelly Bean): Działa
- Galaxy S4 (Android 4.4.2-KitKat): Działa
- Galaxy S5 (Android 4.4.2-KitKat): Działa
- Galaxy S Plus (Android 2.3.3-Gingerbread): Działa
- Galaxy Ace (Android 2.3.6-Pierniki): Robocze
- Galaxy S2 (Android 4.1.2-Jelly Bean): Działa
- Galaxy S3 (Android 4.3-Jelly Bean): Działa
- Galaxy Note 2 (Android 4.3-Jelly Bean): Działa
- Galaxy Nexus (Android 4.2.1-Jelly Bean): Działa
Motorola
- Moto G (Android 4.4.2 - KitKat): Działa
LG
- Nexus 5 (Android 4.4.2 - KitKat): Działa
ZTE
- Blade (Android 2.1-Eclair): Działa
Mam nadzieję, że mogę ci pomóc i jeśli masz dodatkowe pytania lub cokolwiek innego jest niejasne, prosimy o zadawanie!
Warning: date(): Invalid date.timezone value 'Europe/Kyiv', we selected the timezone 'UTC' for now. in /var/www/agent_stack/data/www/doraprojects.net/template/agent.layouts/content.php on line 54
2015-04-28 10:18:01