Jak zmienić kolor tinty przycisku Wyczyść na polu UITextField
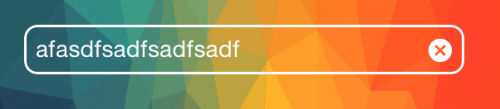
Mam automatycznie wygenerowany przycisk Wyczyść na moim polu UITextfield, z domyślnym niebieskim odcieniem. Nie mogę zmienić koloru tinty na biały. Próbowałem modyfikować storyboard i Kod bez powodzenia i nie chcę używać niestandardowego obrazu.
Jak zmienić domyślny kolor przycisku Wyczyść bez użycia niestandardowego obrazu?

17 answers
Proszę bardzo!
TintTextField.
Używanie niestandardowego obrazu, dodanych przycisków itp.
class TintTextField: UITextField {

  var tintedClearImage: UIImage?

  required init(coder aDecoder: NSCoder) {
    super.init(coder: aDecoder)
    setupTintColor()
  }

  override init(frame: CGRect) {
    super.init(frame: frame)
    setupTintColor()
  }

  func setupTintColor() {
    clearButtonMode = UITextFieldViewMode.WhileEditing
    borderStyle = UITextBorderStyle.RoundedRect
    layer.cornerRadius = 8.0
    layer.masksToBounds = true
    layer.borderColor = tintColor.CGColor
    layer.borderWidth = 1.5
    backgroundColor = UIColor.clearColor()
    textColor = tintColor
  }

  override func layoutSubviews() {
    super.layoutSubviews()
    tintClearImage()
  }

  private func tintClearImage() {
    for view in subviews as! [UIView] {
      if view is UIButton {
        let button = view as! UIButton
        if let uiImage = button.imageForState(.Highlighted) {
          if tintedClearImage == nil {
            tintedClearImage = tintImage(uiImage, tintColor)
          }
          button.setImage(tintedClearImage, forState: .Normal)
          button.setImage(tintedClearImage, forState: .Highlighted)
        }
      }
    }
  }
}


func tintImage(image: UIImage, color: UIColor) -> UIImage {
  let size = image.size

  UIGraphicsBeginImageContextWithOptions(size, false, image.scale)
  let context = UIGraphicsGetCurrentContext()
  image.drawAtPoint(CGPointZero, blendMode: CGBlendMode.Normal, alpha: 1.0)

  CGContextSetFillColorWithColor(context, color.CGColor)
  CGContextSetBlendMode(context, CGBlendMode.SourceIn)
  CGContextSetAlpha(context, 1.0)

  let rect = CGRectMake(
    CGPointZero.x,
    CGPointZero.y,
    image.size.width,
    image.size.height)
  CGContextFillRect(UIGraphicsGetCurrentContext(), rect)
  let tintedImage = UIGraphicsGetImageFromCurrentImageContext()
  UIGraphicsEndImageContext()

  return tintedImage
}
Warning: date(): Invalid date.timezone value 'Europe/Kyiv', we selected the timezone 'UTC' for now. in /var/www/agent_stack/data/www/doraprojects.net/template/agent.layouts/content.php on line 54
2016-06-26 10:24:39
Powodem, dla którego masz problem z zrobieniem tego, jest to, że obrazy przycisków clear nie są przyciemnione. To tylko normalne obrazy.
Przycisk Wyczyść jest przyciskiem wewnętrznym w polu UITextField. Jak każdy przycisk, może mieć obraz i tak jest. W szczególności ma dwa obrazy: jeden dla stanu normalnego i jeden dla stanu podświetlonego. Niebieski, do którego OP sprzeciwia się jest podświetlony obraz, i może być przechwycony przez uruchomienie tego kodu w momencie, gdy Wyczyść guzik jest obecny:
    let tf = self.tf // the text view
    for sv in tf.subviews as! [UIView] {
        if sv is UIButton {
            let b = sv as! UIButton
            if let im = b.imageForState(.Highlighted) {
                // im is the blue x
            }
        }
    }
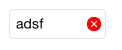
Gdy go uchwycisz, zobaczysz, że jest to obraz TIFF o podwójnej rozdzielczości 14x14, a oto on:

Teoretycznie można zmienić obraz na inny kolor i przypisać go jako obraz przycisku Wyczyść w widoku tekstowym dla podświetlonego stanu. Ale w praktyce nie jest to wcale łatwe do zrobienia, ponieważ przycisk nie zawsze jest obecny; nie można się do niego odwoływać, gdy jest nieobecny (nie jest tylko niewidoczny; w rzeczywistości nie jest częścią hierarchia widoku w ogóle, więc nie ma możliwości uzyskania do niej dostępu).
Ponadto, nie ma interfejsu API UITextField, aby dostosować przycisk Wyczyść.
Dlatego najprostszym rozwiązaniem jest to, co jest zalecane tutaj : Utwórz przycisk z niestandardowymi normalnymi i podświetlonymi obrazami i podaj go jako UITextField rightView. Następnie ustawiasz clearButtonMode Na Never (ponieważ zamiast tego używasz właściwego widoku), a rightViewMode na cokolwiek chcesz.
Będziesz oczywiście musiał wykryć dotknij tego przycisku i odpowiedz, wyczyszczając tekst pola tekstowego; ale jest to łatwe do zrobienia i pozostaje jako ćwiczenie dla czytelnika.
Warning: date(): Invalid date.timezone value 'Europe/Kyiv', we selected the timezone 'UTC' for now. in /var/www/agent_stack/data/www/doraprojects.net/template/agent.layouts/content.php on line 54
2017-05-23 11:54:53
Bazując na odpowiedzi @Mikael Hellman przygotowałem podobną implementację podklasy UITextField dla Objective-C. jedyną różnicą jest to, że pozwalam na osobne kolory dla Stanów normalnych i podświetlonych.
.plik h
#import <UIKit/UIKit.h>


@interface TextFieldTint : UITextField

-(void) setColorButtonClearHighlighted:(UIColor *)colorButtonClearHighlighted;
-(void) setColorButtonClearNormal:(UIColor *)colorButtonClearNormal;

@end
.plik m
#import "TextFieldTint.h"

@interface TextFieldTint()

@property (nonatomic,strong) UIColor *colorButtonClearHighlighted;
@property (nonatomic,strong) UIColor *colorButtonClearNormal;

@property (nonatomic,strong) UIImage *imageButtonClearHighlighted;
@property (nonatomic,strong) UIImage *imageButtonClearNormal;


@end

@implementation TextFieldTint


-(void) layoutSubviews
{
    [super layoutSubviews];
    [self tintButtonClear];
}

-(void) setColorButtonClearHighlighted:(UIColor *)colorButtonClearHighlighted
{
    _colorButtonClearHighlighted = colorButtonClearHighlighted;
}

-(void) setColorButtonClearNormal:(UIColor *)colorButtonClearNormal
{
    _colorButtonClearNormal = colorButtonClearNormal;
}

-(UIButton *) buttonClear
{
    for(UIView *v in self.subviews)
    {
        if([v isKindOfClass:[UIButton class]])
        {
            UIButton *buttonClear = (UIButton *) v;
            return buttonClear;
        }
    }
    return nil;
}


-(void) tintButtonClear
{
    UIButton *buttonClear = [self buttonClear];

    if(self.colorButtonClearNormal && self.colorButtonClearHighlighted && buttonClear)
    {
        if(!self.imageButtonClearHighlighted)
        {
            UIImage *imageHighlighted = [buttonClear imageForState:UIControlStateHighlighted];
            self.imageButtonClearHighlighted = [[self class] imageWithImage:imageHighlighted
                                                                  tintColor:self.colorButtonClearHighlighted];
        }
        if(!self.imageButtonClearNormal)
        {
            UIImage *imageNormal = [buttonClear imageForState:UIControlStateNormal];
            self.imageButtonClearNormal = [[self class] imageWithImage:imageNormal
                                                             tintColor:self.colorButtonClearNormal];
        }

        if(self.imageButtonClearHighlighted && self.imageButtonClearNormal)
        {
            [buttonClear setImage:self.imageButtonClearHighlighted forState:UIControlStateHighlighted];
            [buttonClear setImage:self.imageButtonClearNormal forState:UIControlStateNormal];
        }
    }
}


+ (UIImage *) imageWithImage:(UIImage *)image tintColor:(UIColor *)tintColor
{
    UIGraphicsBeginImageContextWithOptions(image.size, NO, 0.0);
    CGContextRef context = UIGraphicsGetCurrentContext();

    CGRect rect = (CGRect){ CGPointZero, image.size };
    CGContextSetBlendMode(context, kCGBlendModeNormal);
    [image drawInRect:rect];

    CGContextSetBlendMode(context, kCGBlendModeSourceIn);
    [tintColor setFill];
    CGContextFillRect(context, rect);

    UIImage *imageTinted  = UIGraphicsGetImageFromCurrentImageContext();
    UIGraphicsEndImageContext();
    return imageTinted;
}
@end
Warning: date(): Invalid date.timezone value 'Europe/Kyiv', we selected the timezone 'UTC' for now. in /var/www/agent_stack/data/www/doraprojects.net/template/agent.layouts/content.php on line 54
2015-06-29 09:29:54
W języku Swift możesz napisać rozszerzenie i użyć go na dowolnym polu tekstowym w swoim projekcie.
extension UITextField {
    func modifyClearButton(with image : UIImage) {
        let clearButton = UIButton(type: .custom)
        clearButton.setImage(image, for: .normal)
        clearButton.frame = CGRect(x: 0, y: 0, width: 15, height: 15)
        clearButton.contentMode = .scaleAspectFit
        clearButton.addTarget(self, action: #selector(UITextField.clear(_:)), for: .touchUpInside)
        rightView = clearButton
        rightViewMode = .whileEditing
    }

    func clear(_ sender : AnyObject) {
        self.text = ""
        sendActions(for: .editingChanged)
    }
}
Warning: date(): Invalid date.timezone value 'Europe/Kyiv', we selected the timezone 'UTC' for now. in /var/www/agent_stack/data/www/doraprojects.net/template/agent.layouts/content.php on line 54
2017-02-10 17:00:09
Dla Swift 4 dodaj to do podklasy UITextField:
import UIKit

class CustomTextField: UITextField {

    override func layoutSubviews() {
        super.layoutSubviews()

        for view in subviews {
            if let button = view as? UIButton {
                button.setImage(button.image(for: .normal)?.withRenderingMode(.alwaysTemplate), for: .normal)
                button.tintColor = .white
            }
        }
    }
}
Warning: date(): Invalid date.timezone value 'Europe/Kyiv', we selected the timezone 'UTC' for now. in /var/www/agent_stack/data/www/doraprojects.net/template/agent.layouts/content.php on line 54
2018-08-21 03:49:51
Możesz użyć KVO, aby uzyskać dostęp do przycisku Wyczyść i zaktualizować go:
    UIButton *clearButton = [myTextField valueForKey:@"_clearButton"]
    if([clearButton respondsToSelector:@selector(setImage:forState:)]){

        //ensure that the app won't crash in the future if _clearButton reference changes to a different class instance
        [clearButton setImage:[UIImage imageNamed:@"MyImage.png"] forState:UIControlStateNormal];

    }
Uwaga: To rozwiązanie nie jest przyszłościowe - jeśli Apple zmieni implementację przycisku clear, to z wdziękiem przestanie działać.
Warning: date(): Invalid date.timezone value 'Europe/Kyiv', we selected the timezone 'UTC' for now. in /var/www/agent_stack/data/www/doraprojects.net/template/agent.layouts/content.php on line 54
2015-11-09 16:45:15
Może to być nawet łatwiejsze niż najwyżej oceniana odpowiedź, dostępna dla iOS 7 i nowszych.
@interface MyTextField

@end

@implementation MyTextField

- (void)layoutSubviews {
    [super layoutSubviews];

    for (UIView *subView in self.subviews) {
        if ([subView isKindOfClass:[UIButton class]]) {
            UIButton *button = (UIButton *)subView;
            [button setImage:[[button imageForState:UIControlStateNormal] imageWithRenderingMode:UIImageRenderingModeAlwaysTemplate]
                    forState:UIControlStateNormal];
            button.tintColor = self.tintColor;
        }
    }
}

@end
Warning: date(): Invalid date.timezone value 'Europe/Kyiv', we selected the timezone 'UTC' for now. in /var/www/agent_stack/data/www/doraprojects.net/template/agent.layouts/content.php on line 54
2016-10-07 19:41:50
Oto zaktualizowane rozwiązanie Swift 3:
extension UITextField {
    func modifyClearButtonWithImage(image : UIImage) {
        let clearButton = UIButton(type: .custom)
        clearButton.setImage(image, for: .normal)
        clearButton.frame = CGRect(x: 0, y: 0, width: 15, height: 15)
        clearButton.contentMode = .scaleAspectFit
        clearButton.addTarget(self, action: #selector(self.clear(sender:)), for: .touchUpInside)
        self.rightView = clearButton
        self.rightViewMode = .whileEditing
    }

    func clear(sender : AnyObject) {
        self.text = ""
    }
}
Enjoy;)
Warning: date(): Invalid date.timezone value 'Europe/Kyiv', we selected the timezone 'UTC' for now. in /var/www/agent_stack/data/www/doraprojects.net/template/agent.layouts/content.php on line 54
2016-12-26 13:54:43
Jeśli używasz UIAppearance w aplikacji, możesz ustawić kolor tintColor dla przycisku Wyczyść w czasie wykonywania.
let textField = UITextField.appearance()
textField.tintColor = .greenColor()
Podczas uruchamiania wywołujemy funkcję klasy w naszym AppDelegate, która ma wiele innych kontrolek, które mają swoje .appearance() skonfigurowane w nim.
Załóżmy, że twoja klasa, która ustawia wygląd w Twojej aplikacji nazywa się Beautyify stworzyłbyś coś takiego:
@objc class Beautify: NSObject {
    class func applyAppearance() {
        let tableViewAppearance = UITableView.appearance()
        tableViewAppearance.tintColor = .blueColor()

        let textField = UITextField.appearance()
        textField.tintColor = .greenColor()
    }
}
Następnie wewnątrz AppDelegate didFinishLaunchingWithOptions Po Prostu zadzwoń.
Beautify.applyAppearance()
Warning: date(): Invalid date.timezone value 'Europe/Kyiv', we selected the timezone 'UTC' for now. in /var/www/agent_stack/data/www/doraprojects.net/template/agent.layouts/content.php on line 54
2016-09-09 22:59:07
To działało dla mnie przy użyciu objective-C. wyciągnąłem kawałki z innych wątków na ten temat i wymyśliłem takie rozwiązanie:
UIButton *btnClear = [self.textFieldUserID valueForKey:@"clearButton"];
[btnClear setImage:[UIImage imageNamed:@"facebookLoginButton"] forState:UIControlStateNormal];
Warning: date(): Invalid date.timezone value 'Europe/Kyiv', we selected the timezone 'UTC' for now. in /var/www/agent_stack/data/www/doraprojects.net/template/agent.layouts/content.php on line 54
2016-11-29 01:23:42
Odpowiedź zamieszczona przez Matta powyżej jest poprawna. Przycisk Wyczyść wewnątrz UITextField nie istnieje, jeśli nie jest pokazany. Można spróbować uzyskać do niego dostęp zaraz po wykonaniu layoutSubviews i sprawdzeniu istnienia przycisku.
Najprostszym podejściem jest podklasowanie UITextField, nadpisanie layoutSubviews i jeśli przycisk jest wyświetlany po raz pierwszy, Zapisz jego oryginalny obraz(y) do późniejszego użycia, a następnie podczas kolejnych pokazów zastosuj odcień.
Poniżej pokażę Ci jak to zrobić za pomocą rozszerzenia ponieważ w ten sposób możesz zastosować swój własny odcień do dowolnego pola UITextField, włączając te zagnieżdżone w gotowych klasach, takich jak UISearchBar.
Baw się dobrze i daj kciuki w górę, jeśli ci się spodoba:)
Swift 3.2
Oto główne rozszerzenie:
import UIKit

extension UITextField {

    private struct UITextField_AssociatedKeys {
        static var clearButtonTint = "uitextfield_clearButtonTint"
        static var originalImage = "uitextfield_originalImage"
    }

    private var originalImage: UIImage? {
        get {
            if let cl = objc_getAssociatedObject(self, &UITextField_AssociatedKeys.originalImage) as? Wrapper<UIImage> {
                return cl.underlying
            }
            return nil
        }
        set {
            objc_setAssociatedObject(self, &UITextField_AssociatedKeys.originalImage, Wrapper<UIImage>(newValue), .OBJC_ASSOCIATION_RETAIN)
        }
    }

    var clearButtonTint: UIColor? {
        get {
            if let cl = objc_getAssociatedObject(self, &UITextField_AssociatedKeys.clearButtonTint) as? Wrapper<UIColor> {
                return cl.underlying
            }
            return nil
        }
        set {
            UITextField.runOnce
            objc_setAssociatedObject(self, &UITextField_AssociatedKeys.clearButtonTint, Wrapper<UIColor>(newValue), .OBJC_ASSOCIATION_RETAIN)
            applyClearButtonTint()
        }
    }

    private static let runOnce: Void = {
        Swizzle.for(UITextField.self, selector: #selector(UITextField.layoutSubviews), with: #selector(UITextField.uitextfield_layoutSubviews))
    }()

    private func applyClearButtonTint() {
        if let button = UIView.find(of: UIButton.self, in: self), let color = clearButtonTint {
            if originalImage == nil {
                originalImage = button.image(for: .normal)
            }
            button.setImage(originalImage?.tinted(with: color), for: .normal)
        }
    }

    func uitextfield_layoutSubviews() {
        uitextfield_layoutSubviews()
        applyClearButtonTint()
    }

}
Oto dodatkowe fragmenty użyte w powyższym kodzie:
Ładny wrapper dla wszystkich rzeczy, które chcesz uzyskać dostęp do obiektów:
class Wrapper<T> {
    var underlying: T?

    init(_ underlying: T?) {
        self.underlying = underlying
    }
}
Garść rozszerzeń do znajdowania zagnieżdżonych podviewów dowolnego "type": "content"]}
extension UIView {

    static func find<T>(of type: T.Type, in view: UIView, includeSubviews: Bool = true) -> T? where T: UIView {
        if view.isKind(of: T.self) {
            return view as? T
        }
        for subview in view.subviews {
            if subview.isKind(of: T.self) {
                return subview as? T
            } else if includeSubviews, let control = find(of: type, in: subview) {
                return control
            }
        }
        return nil
    }

}
Rozszerzenie dla {[8] } do nakładania koloru tint
extension UIImage {

    func tinted(with color: UIColor) -> UIImage? {
        UIGraphicsBeginImageContextWithOptions(self.size, false, self.scale)
        color.set()
        self.withRenderingMode(.alwaysTemplate).draw(in: CGRect(origin: CGPoint(x: 0, y: 0), size: self.size))

        let result = UIGraphicsGetImageFromCurrentImageContext()
        UIGraphicsEndImageContext()

        return result
    }

}
...i na koniec Skaczące rzeczy:
class Swizzle {

    class func `for`(_ className: AnyClass, selector originalSelector: Selector, with newSelector: Selector) {
        let method: Method = class_getInstanceMethod(className, originalSelector)
        let swizzledMethod: Method = class_getInstanceMethod(className, newSelector)
        if (class_addMethod(className, originalSelector, method_getImplementation(swizzledMethod), method_getTypeEncoding(swizzledMethod))) {
            class_replaceMethod(className, newSelector, method_getImplementation(method), method_getTypeEncoding(method))
        } else {
            method_exchangeImplementations(method, swizzledMethod)
        }
    }

}
Warning: date(): Invalid date.timezone value 'Europe/Kyiv', we selected the timezone 'UTC' for now. in /var/www/agent_stack/data/www/doraprojects.net/template/agent.layouts/content.php on line 54
2017-10-13 11:00:12
Swift 4, czysta i zwięzła podklasa
import UIKit

class CustomTextField: UITextField {
    override func layoutSubviews() {
        super.layoutSubviews()
        for view in subviews where view is UIButton {
            (view as! UIButton).setImage(<MY_UIIMAGE>, for: .normal)
        }
    }
}
Warning: date(): Invalid date.timezone value 'Europe/Kyiv', we selected the timezone 'UTC' for now. in /var/www/agent_stack/data/www/doraprojects.net/template/agent.layouts/content.php on line 54
2018-08-06 13:12:11
Po przejrzeniu wszystkich odpowiedzi i możliwości, znalazłem to proste i proste rozwiązanie.
-(void)updateClearButtonColor:(UIColor *)color ofTextField:(UITextField *)textField {

    UIButton *btnClear = [textField valueForKey:@"_clearButton"];
    UIImage * img = [btnClear imageForState:UIControlStateNormal];

    if (img) {
        UIImage * renderingModeImage = [img imageWithRenderingMode:UIImageRenderingModeAlwaysTemplate];
        [btnClear setImage:renderingModeImage forState:UIControlStateNormal];
        //-- Add states you want to update
        [btnClear setImage:renderingModeImage forState:UIControlStateSelected];
    }

    [btnClear setTintColor:color];
}


[self updateClearButtonColor:[UIColor whiteColor] ofTextField:self.textField];
Warning: date(): Invalid date.timezone value 'Europe/Kyiv', we selected the timezone 'UTC' for now. in /var/www/agent_stack/data/www/doraprojects.net/template/agent.layouts/content.php on line 54
2017-07-04 07:39:08
W SWIFT 3: to działa dla mnie
    if let clearButton = self.textField.value(forKey: "_clearButton") as? UIButton {
        // Create a template copy of the original button image
        let templateImage =  clearButton.imageView?.image?.withRenderingMode(.alwaysTemplate)

        // Set the template image copy as the button image
        clearButton.setImage(templateImage, for: .normal)
        clearButton.setImage(templateImage, for: .highlighted)

        // Finally, set the image color
        clearButton.tintColor = .white
    }
Warning: date(): Invalid date.timezone value 'Europe/Kyiv', we selected the timezone 'UTC' for now. in /var/www/agent_stack/data/www/doraprojects.net/template/agent.layouts/content.php on line 54
2017-07-27 12:00:01
Możesz użyć mojej biblioteki LSCategories aby to zrobić z jedną linijką:
[textField lsSetClearButtonWithColor:[UIColor redColor] mode:UITextFieldViewModeAlways];
Nie używa żadnego prywatnego api, Nie wyszukuje oryginalnego UIButton w hierarchii podwidów UITextField i nie wymaga podklasowania UITextField jako innych odpowiedzi tutaj. Zamiast tego używa właściwości rightView do naśladowania przycisku Wyczyść system, dlatego nie musisz się martwić, że przestanie działać w przyszłości, jeśli Apple coś zmieni. Działa również w języku Swift.
Warning: date(): Invalid date.timezone value 'Europe/Kyiv', we selected the timezone 'UTC' for now. in /var/www/agent_stack/data/www/doraprojects.net/template/agent.layouts/content.php on line 54
2018-03-27 14:53:04
Swift 4, to działa dla mnie (zmień tintColor na swój własny kolor):
var didSetupWhiteTintColorForClearTextFieldButton = false

private func setupTintColorForTextFieldClearButtonIfNeeded() {
    // Do it once only
    if didSetupWhiteTintColorForClearTextFieldButton { return }

    guard let button = yourTextField.value(forKey: "_clearButton") as? UIButton else { return }
    guard let icon = button.image(for: .normal)?.withRenderingMode(.alwaysTemplate) else { return }
    button.setImage(icon, for: .normal)
    button.tintColor = .white
    didSetupWhiteTintColorForClearTextFieldButton = true
}

override func viewDidLayoutSubviews() {
    super.viewDidLayoutSubviews()
    setupTintColorForTextFieldClearButtonIfNeeded()
}
Musisz zadzwonić do viewDidLayoutSubviews(), aby upewnić się, że w końcu zostanie wywołany, ponieważ są różne sytuacje clearButtonMode(always, whileEditing, itd.). Uważam, że te przyciski są tworzone leniwie. Więc zgłoś to viewDidLoad() w większości nie działa.
Warning: date(): Invalid date.timezone value 'Europe/Kyiv', we selected the timezone 'UTC' for now. in /var/www/agent_stack/data/www/doraprojects.net/template/agent.layouts/content.php on line 54
2018-04-24 08:14:25
Możesz użyć niestandardowej ikony i działa ona w iOS 11,
searchBar.setImage(UIImage(named: "ic_clear"), for: .clear, state: .normal)
Warning: date(): Invalid date.timezone value 'Europe/Kyiv', we selected the timezone 'UTC' for now. in /var/www/agent_stack/data/www/doraprojects.net/template/agent.layouts/content.php on line 54
2018-09-10 12:35:24